
Single Sign-On: Custom SAML 2.0 integration
pganalyze supports the Identity Provider (IdP) initiated SSO feature of SAML 2.0.
There are two steps to enable the SAML integration:
- Register pganalyze with your Identity Provider (IdP)
- Register the Identity Provider (IdP) with pganalyze
When using Okta you can follow the more-specific Okta integration steps.
Register pganalyze with your Identity Provider (IdP)
To retrieve the SAML settings specific to your organization, you can navigate to the Integrations settings page in your pganalyze account, where you will see the Single Sign-On with SAML panel.
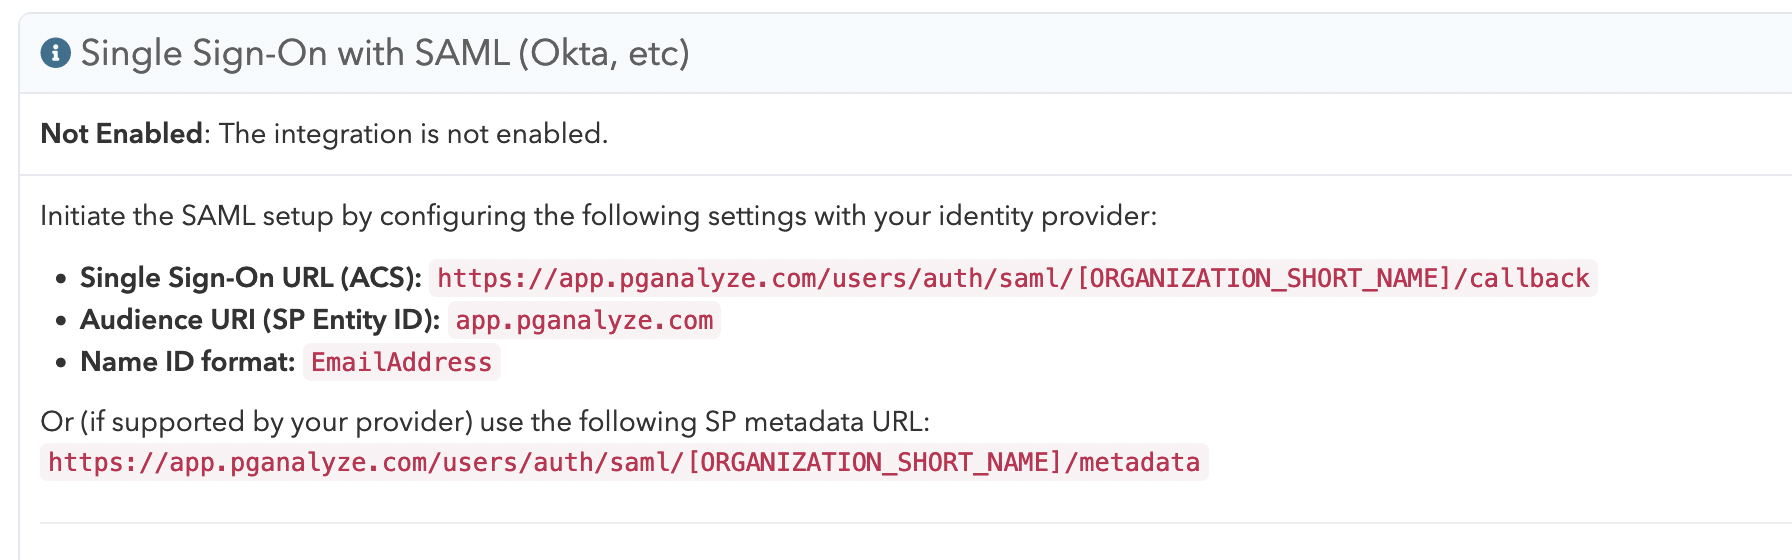
We recommend copying these values directly from the pganalyze app to your Identity Provider (IdP). Alternatively, you can use the templates at the end of this document for reference.
When configuring settings manually with your IdP, make sure to specify both the
Single Sign-On URL (ACS) as well as setting the Name ID Format to
EmailAddress.
In addition, you also need to specify the following SAML attribute mappings:
email: The user’s email address (required)name: The user’s full name (recommended)
Note that you do not need to provide a pganalyze-issued certificate to the IdP, as this is not required for IdP-initiated SSO.
Once you have configured the provider, you can continue in the pganalyze app.
Register the Identity Provider (IdP) with pganalyze
To tell pganalyze which IdP you trust, you need to retrieve the metadata URL from the IdP, and then configure it on the pganalyze Integrations settings page:
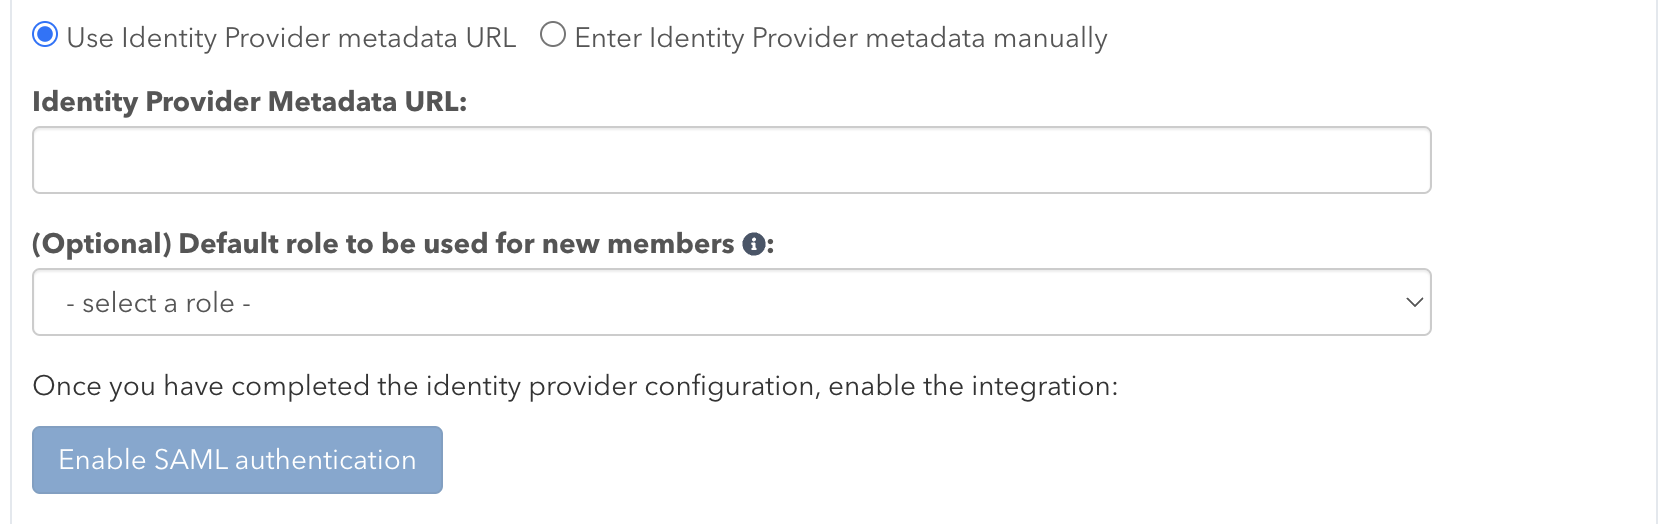
Alternately, you can specify Service Provider (SP) settings directly:

Once you submit the metadata, pganalyze will verify the configuration, and either provide an error, or show the following indicating successful setup:
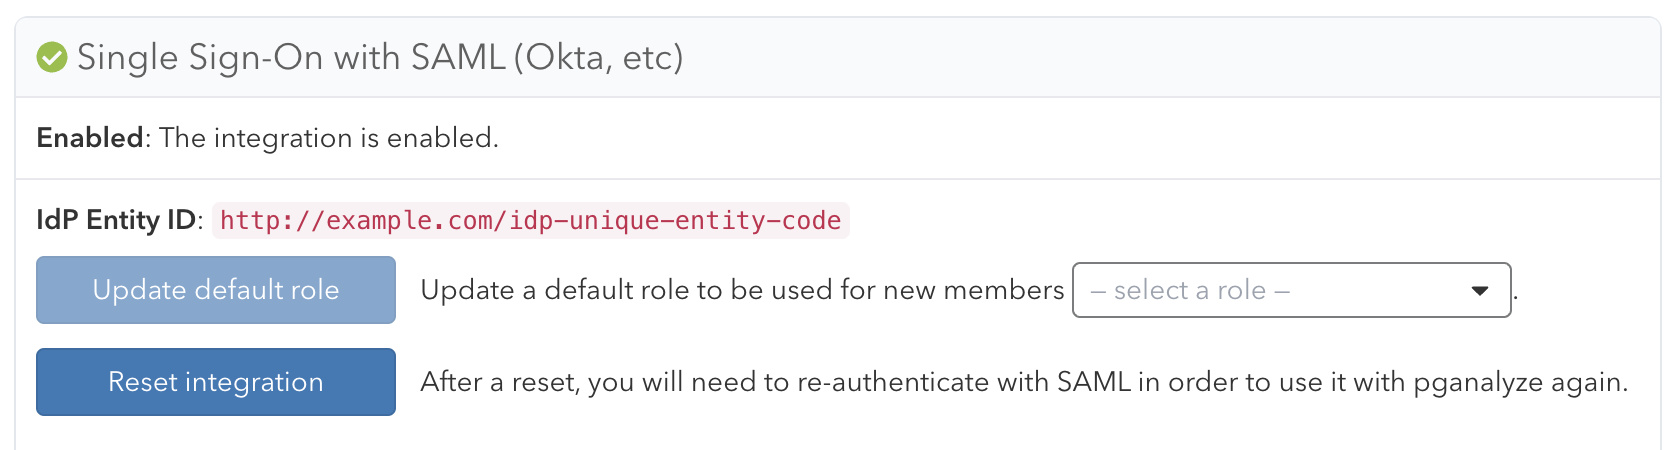
SSO setup is now complete. Going forward your team members can now sign in to pganalyze through your Identity Provider (IdP).
Read more about how to migrate users and general Single Sign-On functionality.
Reference: pganalyze SAML IdP settings template
We recommend copying the IdP settings directly from the pganalyze app, but you can alternately construct the IdP settings based on this template.
The settings follow this format for cloud-based pganalyze accounts:
- ACS URL:
https://app.pganalyze.com/users/auth/saml/[ORGANIZATION_SHORT_NAME]/callback - Metadata URL:
https://app.pganalyze.com/users/auth/saml/[ORGANIZATION_SHORT_NAME]/metadata - Audience URI:
app.pganalyze.com
Replace [ORGANIZATION_SHORT_NAME] with your organization’s short name
(e.g. used in /organizations/[ORGANIZATION_SHORT_NAME] URLs).
The format for pganalyze Enterprise Server installs is similar, but based on your chosen domain name:
- ACS URL:
https://[DOMAIN_NAME]/users/auth/saml/[ORGANIZATION_SHORT_NAME]/callback - Metadata URL:
https://[DOMAIN_NAME]/users/auth/saml/[ORGANIZATION_SHORT_NAME]/metadata - Audience URI:
[DOMAIN_NAME]
If you are using pganalyze Enterprise Server, also replace [DOMAIN_NAME] with
the value of your DOMAIN_NAME environment variable.
Couldn't find what you were looking for or want to talk about something specific?
Start a conversation with us →