Step 3: Install the Collector
In this step we'll install the collector which sends statistics information to pganalyze.
Set up Managed Identity
To start, we need to create a new user-assigned Managed Identity through the Azure Portal.
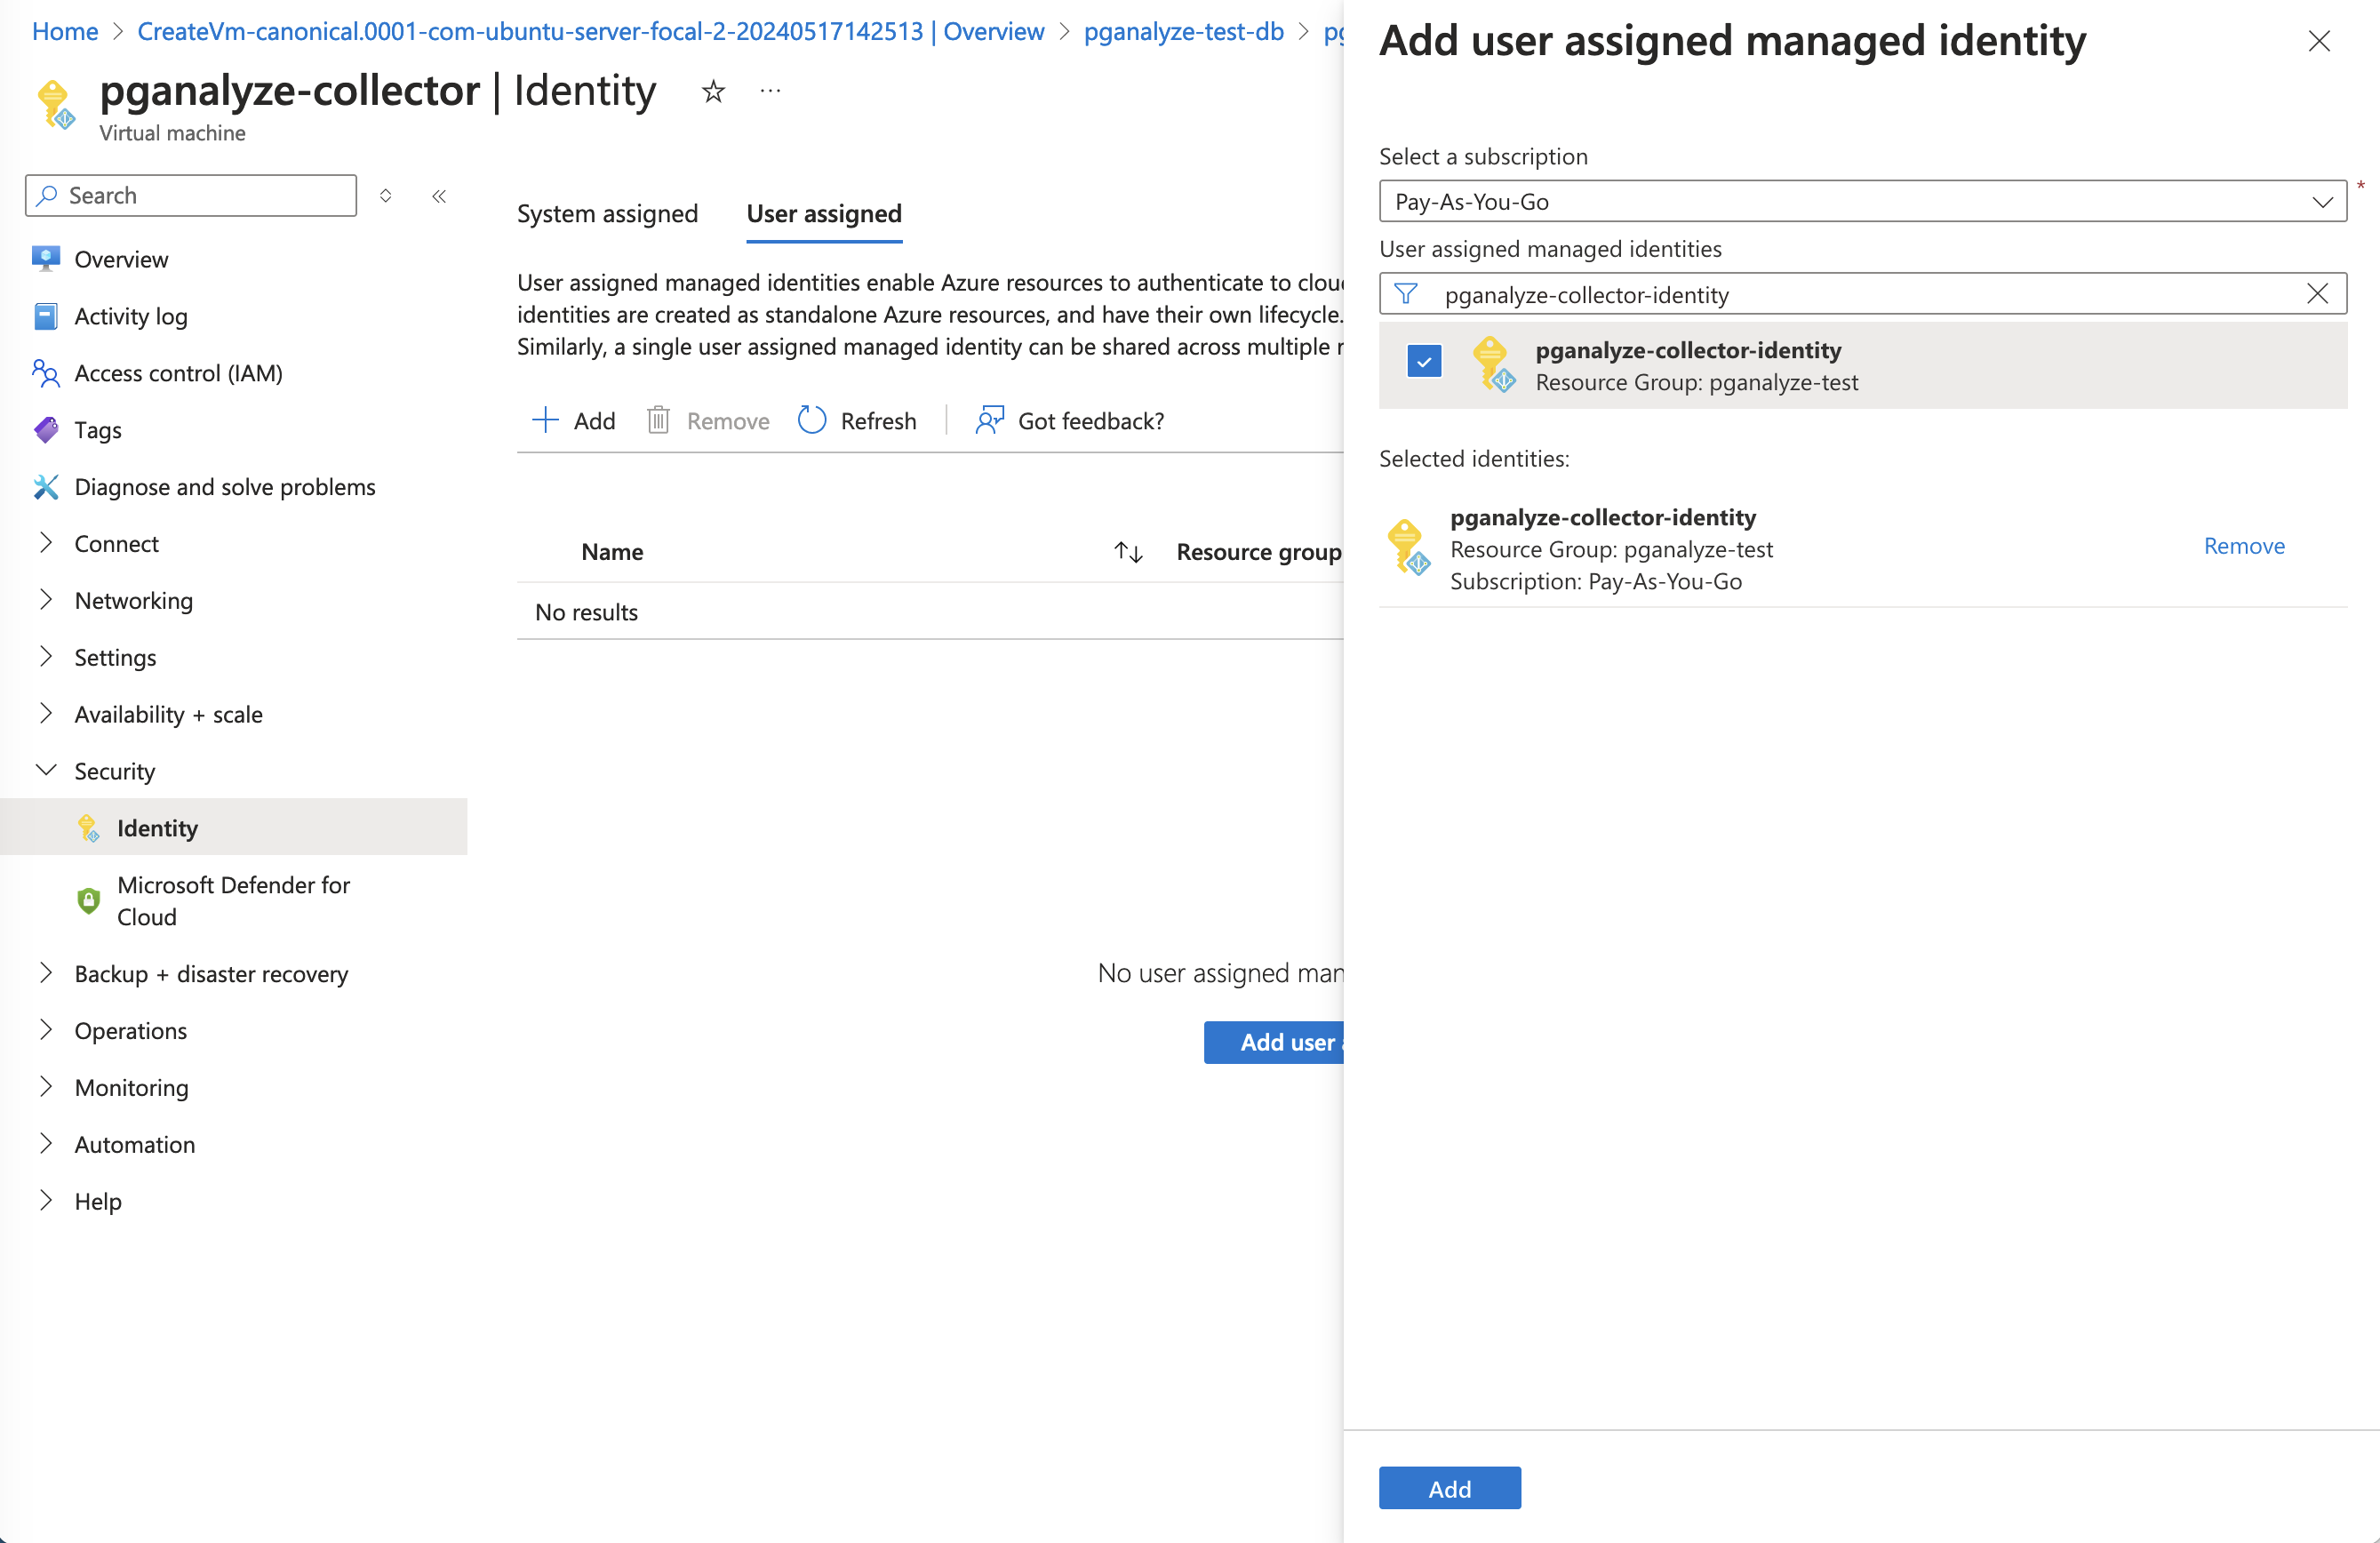
After the Managed Identity is created, assign it to your virtual machine by going to "Security", "Identity", "User assigned" and clicking "Add user assigned managed identity":

Now the pganalyze collector running inside the virtual machine will be able to call Azure REST APIs using the Managed Identity.
Grant Access to Database
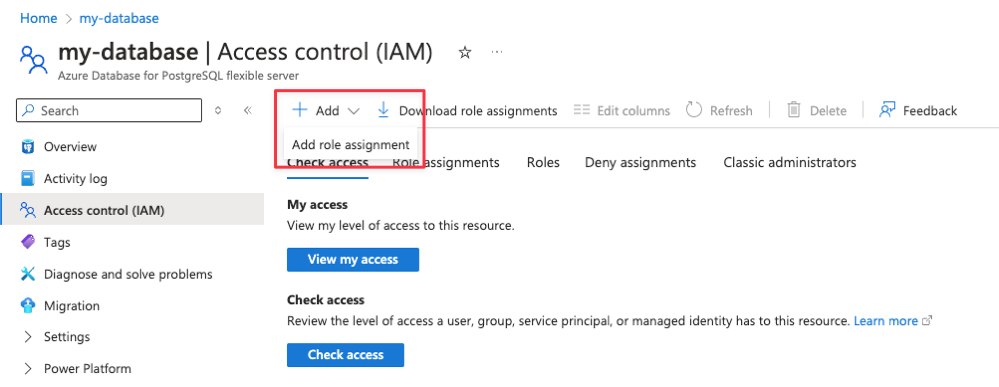
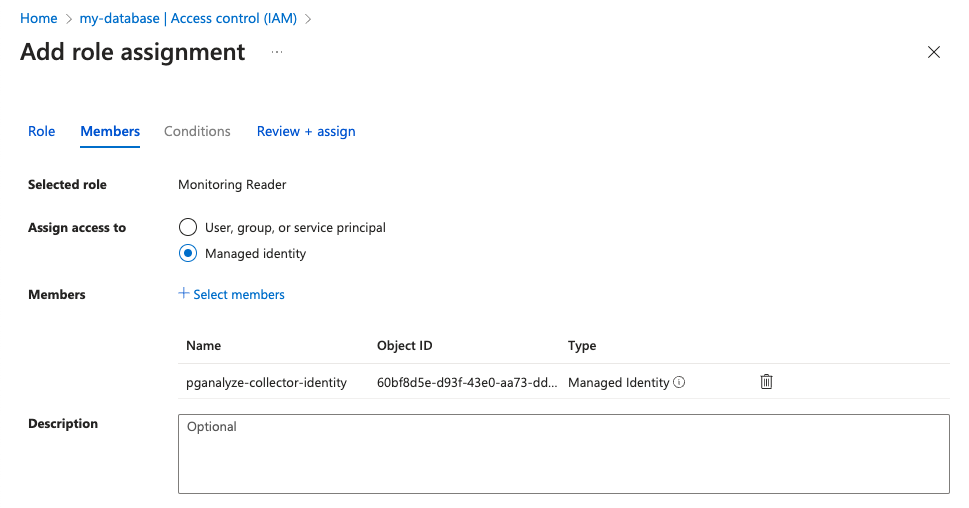
Next, grant access to the DB instance by assigning the role with the created Managed Identity. Go to the DB instance's page in the Azure Portal and select Access Control (IAM). Click "Add role assignment", then choose the "Monitoring Reader" role. Next, assign access to the created Managed Identity.


This allows the collector to view the DB instance information, as well as obtain the metrics like CPU usage.
If you are using Azure Cosmos DB for PostgreSQL Cluster, note that cluster-level access control is not supported. As a workaround, grant access at the resource group level instead.
Downloading the collector container
On a VM of your choice, download the Docker image:
docker pull quay.io/pganalyze/collector:stableAs the collector needs to always be running in the background, avoid using Azure Container Instances.
Continue to Step 4: Configure the CollectorCouldn't find what you were looking for or want to talk about something specific?
Start a conversation with us →