
Enterprise Server: Initial Setup (Kubernetes on Amazon EKS)
These are the installation instructions for pganalyze Enterprise Server, targeted for a Kubernetes cluster managed by Amazon EKS in your own AWS account.
- Installation steps
- Pre-requisites
- Step 1: Re-publish the Docker image to your private container registry
- Step 2: Create an IAM policy that has sufficient access to the Amazon RDS APIs
- Step 3: Set up a Kubernetes secret for configuration settings
- Step 4: Create the pganalyze Enterprise deployment
- Step 5: Run the Enterprise self check to verify the configuration and license
- Step 6: Initialize the database
- Step 7: Log in to pganalyze
- Step 8: Preparing your PostgreSQL database for monitoring
- Step 9: Add your first database server to pganalyze
- Next steps
- Appendix: How to apply config changes
Installation steps
Pre-requisites
- Provision an Amazon EKS cluster in your AWS account
- Install the AWS Load balancer controller on your EKS cluster
- Provision a Postgres database (e.g. with Amazon RDS or Amazon Aurora) to store pganalyze statistics information
- AWS CLI (
aws) installed on your machine, and logged in with administrator permissions on your AWS account - Kubernetes CLI (
kubectl) installed on your machine, and logged into the Kubernetes cluster with full permissions
Step 1: Re-publish the Docker image to your private container registry
Perform the next steps on a machine that has full internet connectivity, e.g your personal machine, or a VM, with no outbound access restrictions.
The goal of this first step is to publish the pganalyze software to your private AWS Container Registry, which can be accessed from your Amazon EKS cluster.
First, log in with your license information, shared with you by the pganalyze team:
docker login -e="." -u="pganalyze+enterprise_customer" -p="YOUR_PASSWORD" quay.ioNow pull the image, replacing VERSION with the latest pganalyze Enterprise version:
docker pull quay.io/pganalyze/enterprise:VERSIONCreate a new container repository for pganalyze in the account-specific AWS container registry:
aws ecr create-repository --repository-name pganalyze-enterpriseLog in to the AWS container registry, replacing ACCOUNTID with your AWS account ID, replacing REGION with your AWS region (e.g. “us-west-1”):
aws ecr get-login-password --region REGION | docker login --username AWS --password-stdin ACCOUNTID.dkr.ecr.REGION.amazonaws.comNow tag the pganalyze image with the correct prefix for the AWS registry - make sure to replace the values (ACCOUNTID, REGION, VERSION) here:
docker tag quay.io/pganalyze/enterprise:VERSION ACCOUNTID.dkr.ecr.REGION.amazonaws.com/pganalyze-enterprise:VERSIONAnd now push the tag to the registry:
docker push ACCOUNTID.dkr.ecr.REGION.amazonaws.com/pganalyze-enterprise:VERSIONStep 2: Create an IAM policy that has sufficient access to the Amazon RDS APIs
Create the policy that permits access to Amazon RDS instances you want monitored. Save this to a file named pganalyze_rds_policy.json:
{
    "Version": "2012-10-17",
    "Statement": [
        {
            "Action": [
                "cloudwatch:GetMetricStatistics"
            ],
            "Effect": "Allow",
            "Resource": "*"
        },
        {
            "Action": [
                "logs:GetLogEvents"
            ],
            "Effect": "Allow",
            "Resource": "arn:aws:logs:*:*:log-group:RDSOSMetrics:log-stream:*"
        },
        {
            "Action": [
                "rds:DescribeDBParameters"
            ],
            "Effect": "Allow",
            "Resource": "arn:aws:rds:*:*:pg:*"
        },
        {
            "Action": [
                "rds:DescribeDBInstances",
                "rds:DownloadDBLogFilePortion",
                "rds:DescribeDBLogFiles"
            ],
            "Effect": "Allow",
            "Resource": "arn:aws:rds:*:*:db:*"
        },
        {
            "Action": [
                "rds:DescribeDBClusters"
            ],
            "Effect": "Allow",
            "Resource": "arn:aws:rds:*:*:cluster:*"
        }
    ]
}
This policy allows accessing the metrics and log data for all RDS databases in your account (recommended for the initial setup). Now create the policy:
aws iam create-policy --policy-name pganalyze_rds_policy --policy-document file://pganalyze_rds_policy.jsonAssign the policy to the Amazon EKS node IAM role (replace eksctl-CLUSTER-NodeInstanceRole with your EKS node instance role name):
aws iam attach-role-policy --policy-arn arn:aws:iam::ACCOUNTID:policy/pganalyze_rds_policy --role-name eksctl-CLUSTER-NodeInstanceRoleStep 3: Set up a Kubernetes secret for configuration settings
You can manage Kubernetes secrets using kubectl
There are two sensitive settings, DATABASE_URL and LICENSE_KEY that we store using a Kubernetes secret.
The DATABASE_URL has the format postgres://USERNAME:PASSWORD@HOSTNAME:PORT/DATABASE and specifies the connection used for storing the pganalyze statistics data. We recommend using an administrative user on the statistics database for this connection.
The LICENSE_KEY has been provided to you by the pganalyze Team - replace KEYKEYKEY in the command with the actual key.
kubectl create secret generic pganalyze-secret --from-literal=DATABASE_URL=postgres://USERNAME:PASSWORD@HOSTNAME:PORT/DATABASE --from-literal=LICENSE_KEY=KEYKEYKEY --dry-run=client -o yaml | kubectl apply -f -Step 4: Create the pganalyze Enterprise deployment
Save the following text into a file pganalyze-enterprise.yml:
apiVersion: apps/v1
kind: Deployment
metadata:
name: pganalyze
namespace: default
labels:
app: pganalyze
spec:
selector:
matchLabels:
app: pganalyze
strategy:
type: Recreate
template:
metadata:
labels:
app: pganalyze
spec:
containers:
- name: main
image: 'ACCOUNTID.dkr.ecr.REGION.amazonaws.com/pganalyze-enterprise:VERSION'
resources:
limits:
memory: "8Gi"
ports:
- containerPort: 5000
envFrom:
- secretRef:
name: pganalyze-secret
apiVersion: extensions/v1beta1
kind: Ingress
metadata:
namespace: default
name: pganalyze
annotations:
kubernetes.io/ingress.class: alb
alb.ingress.kubernetes.io/scheme: internet-facing
alb.ingress.kubernetes.io/target-type: ip
alb.ingress.kubernetes.io/inbound-cidrs: 0.0.0.0/0
spec:
rules:
- http:
paths:
- path: /*
backend:
serviceName: pganalyze-service
servicePort: 80
apiVersion: v1
kind: Service
metadata:
name: pganalyze-service
namespace: default
labels:
app: pganalyze
spec:
type: NodePort
selector:
app: pganalyze
ports:
- protocol: TCP
port: 80
targetPort: 5000You will need to adjust the following settings:
- image:
ACCOUNTID.dkr.ecr.REGION.amazonaws.com/pganalyze-enterprise:VERSION
This needs to match the Docker image tag we created earlier - alb.ingress.kubernetes.io/inbound-cidrs:
0.0.0.0/0
Adjust this to restrict the allowed source IPs that can access the load balancer - alb.ingress.kubernetes.io/scheme:
Set this to eitherinternet-facingto give the load balancer a public IP, orinternalfor internal access only
Now deploy the pganalyze Enterprise application:
kubectl apply -f pganalyze-enterprise.ymlWe can confirm the deployment is completed by checking kubectl get deploy:
kubectl get deploy
NAME READY UP-TO-DATE AVAILABLE AGE
pganalyze 1/1 1 1 1mStep 5: Run the Enterprise self check to verify the configuration and license
Run the following command to perform the Enterprise self-check:
kubectl exec -i -t deploy/pganalyze -- /docker-entrypoint.enterprise.sh rake enterprise:self_checkThis should return the following:
Testing database connection... Success!
Testing Redis connection... Success!
Skipping SMTP mailer check - configure MAILER_URL to enable mail sending
Verifying enterprise license... Success!

All tests completed successfully!
If you see an error, double check your configuration settings, and especially the database connections.
In case you get an error for the license verification, please reach out to the pganalyze team.
Step 6: Initialize the database
Run the following to initialize the pganalyze statistics database:
kubectl exec -i -t deploy/pganalyze -- /docker-entrypoint.enterprise.sh rake db:structure:loadDatabase 'postgres' already exists
set_config
------------
(1 row)Then run the following to create the initial admin user:
kubectl exec -i -t deploy/pganalyze -- /docker-entrypoint.enterprise.sh rake db:seedAnd note down the credentials that are returned:
INFO -- : *****************************
INFO -- : *** INITIAL ADMIN CREATED ***
INFO -- : *****************************
INFO -- :
INFO -- : *****************************
INFO -- : Email:    admin@example.com
INFO -- : Password: PASSWORDPASSWORD
INFO -- : *****************************
INFO -- :
INFO -- : Use these credentials to login and then change email address and password.
Now we can connect to the pganalyze UI. Run the following to determine the hostname of the load balancer that was provisioned:
kubectl get ingressNAME CLASS HOSTS ADDRESS PORTS AGE
pganalyze <none> * HOSTNAME.REGION.elb.amazonaws.com 80 5m58sWhen you go to the hostname in your browser you should see the login page. You can now use the initial admin details to log in:
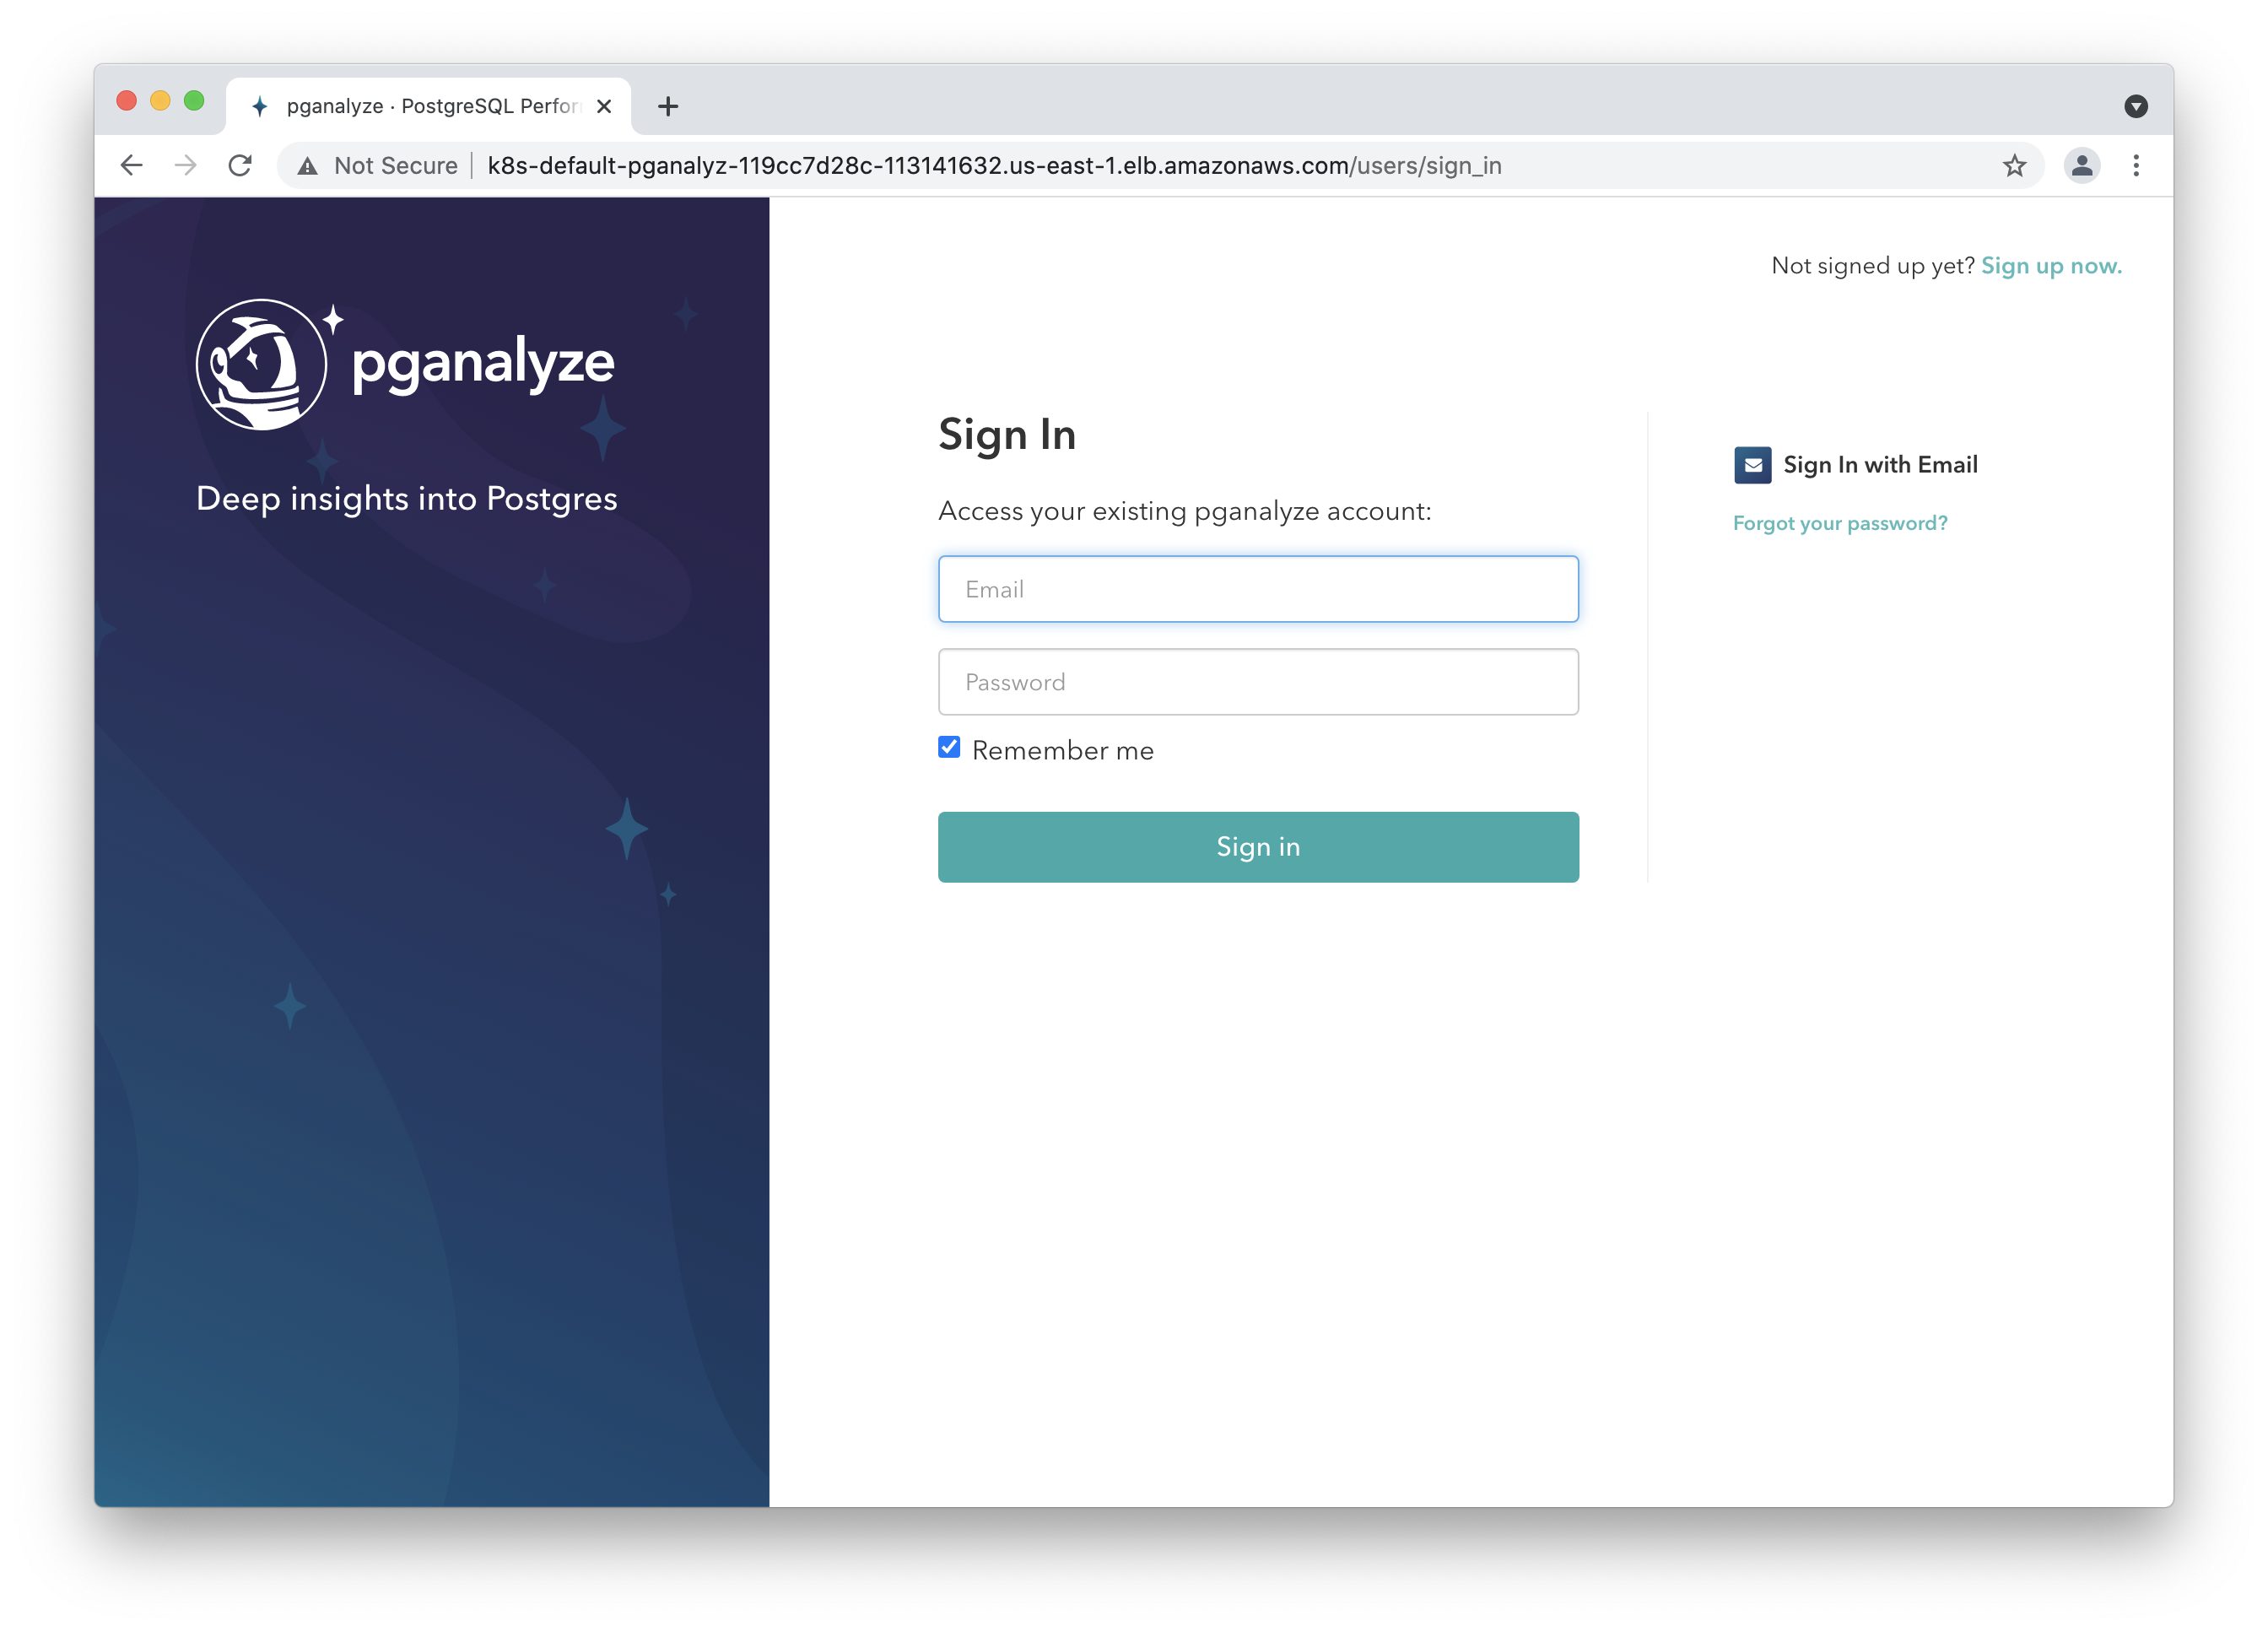
Step 7: Log in to pganalyze
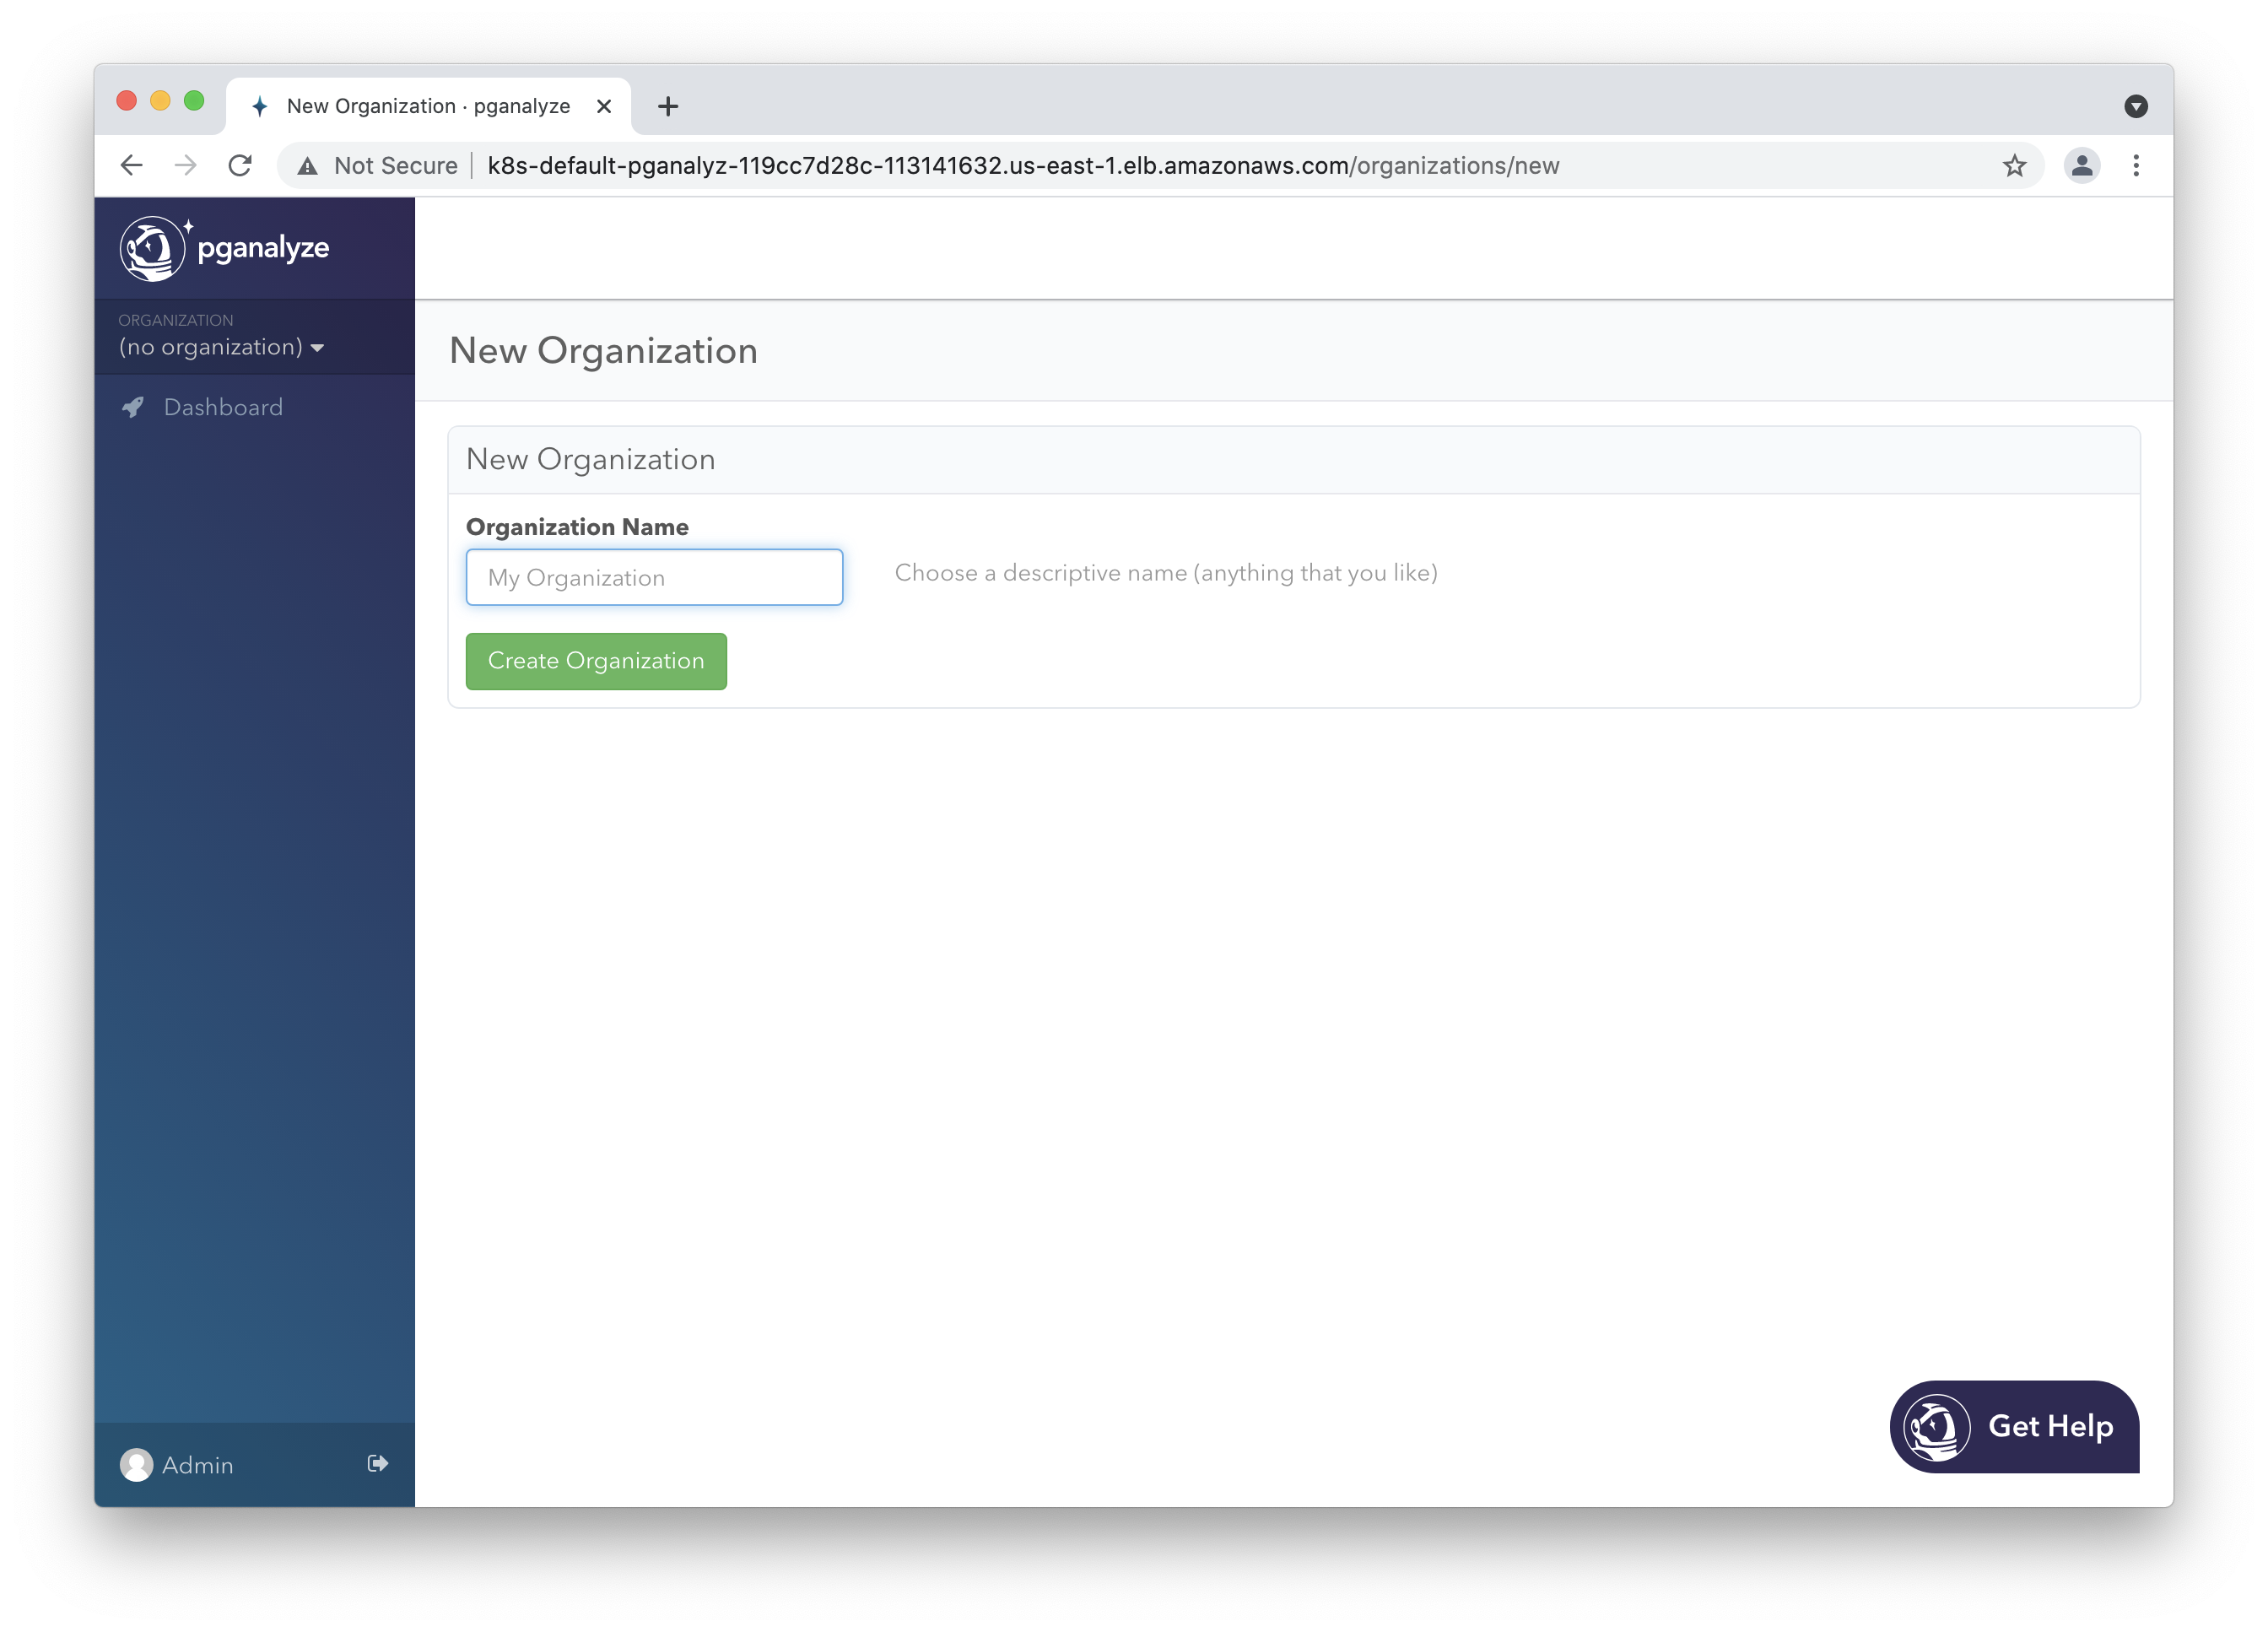
Please now log in to the pganalyze interface using the generated credentials you’ve seen earlier when setting up the database. If successful you should see this screen:
If authentication does not work, or you see an error message, please check the container’s logs using kubectl logs deploy/pganalyze.
Choose an organization name of your choice (typically your company name).
Step 8: Preparing your PostgreSQL database for monitoring
Before you can add a database to the pganalyze installation, you’ll need to enable the pg_stat_statements extension on it. This extension is already enabled on most Amazon RDS database servers by default. You can find details in the Amazon RDS instructions.
In addition you will need to either use the database superuser (usually “postgres”) to give pganalyze access to your database, or create a special restricted monitoring user.
You don’t need to run anything else on your database server - the pganalyze container will connect to your database at regular intervals to gather information from PostgreSQL’s statistics tables.
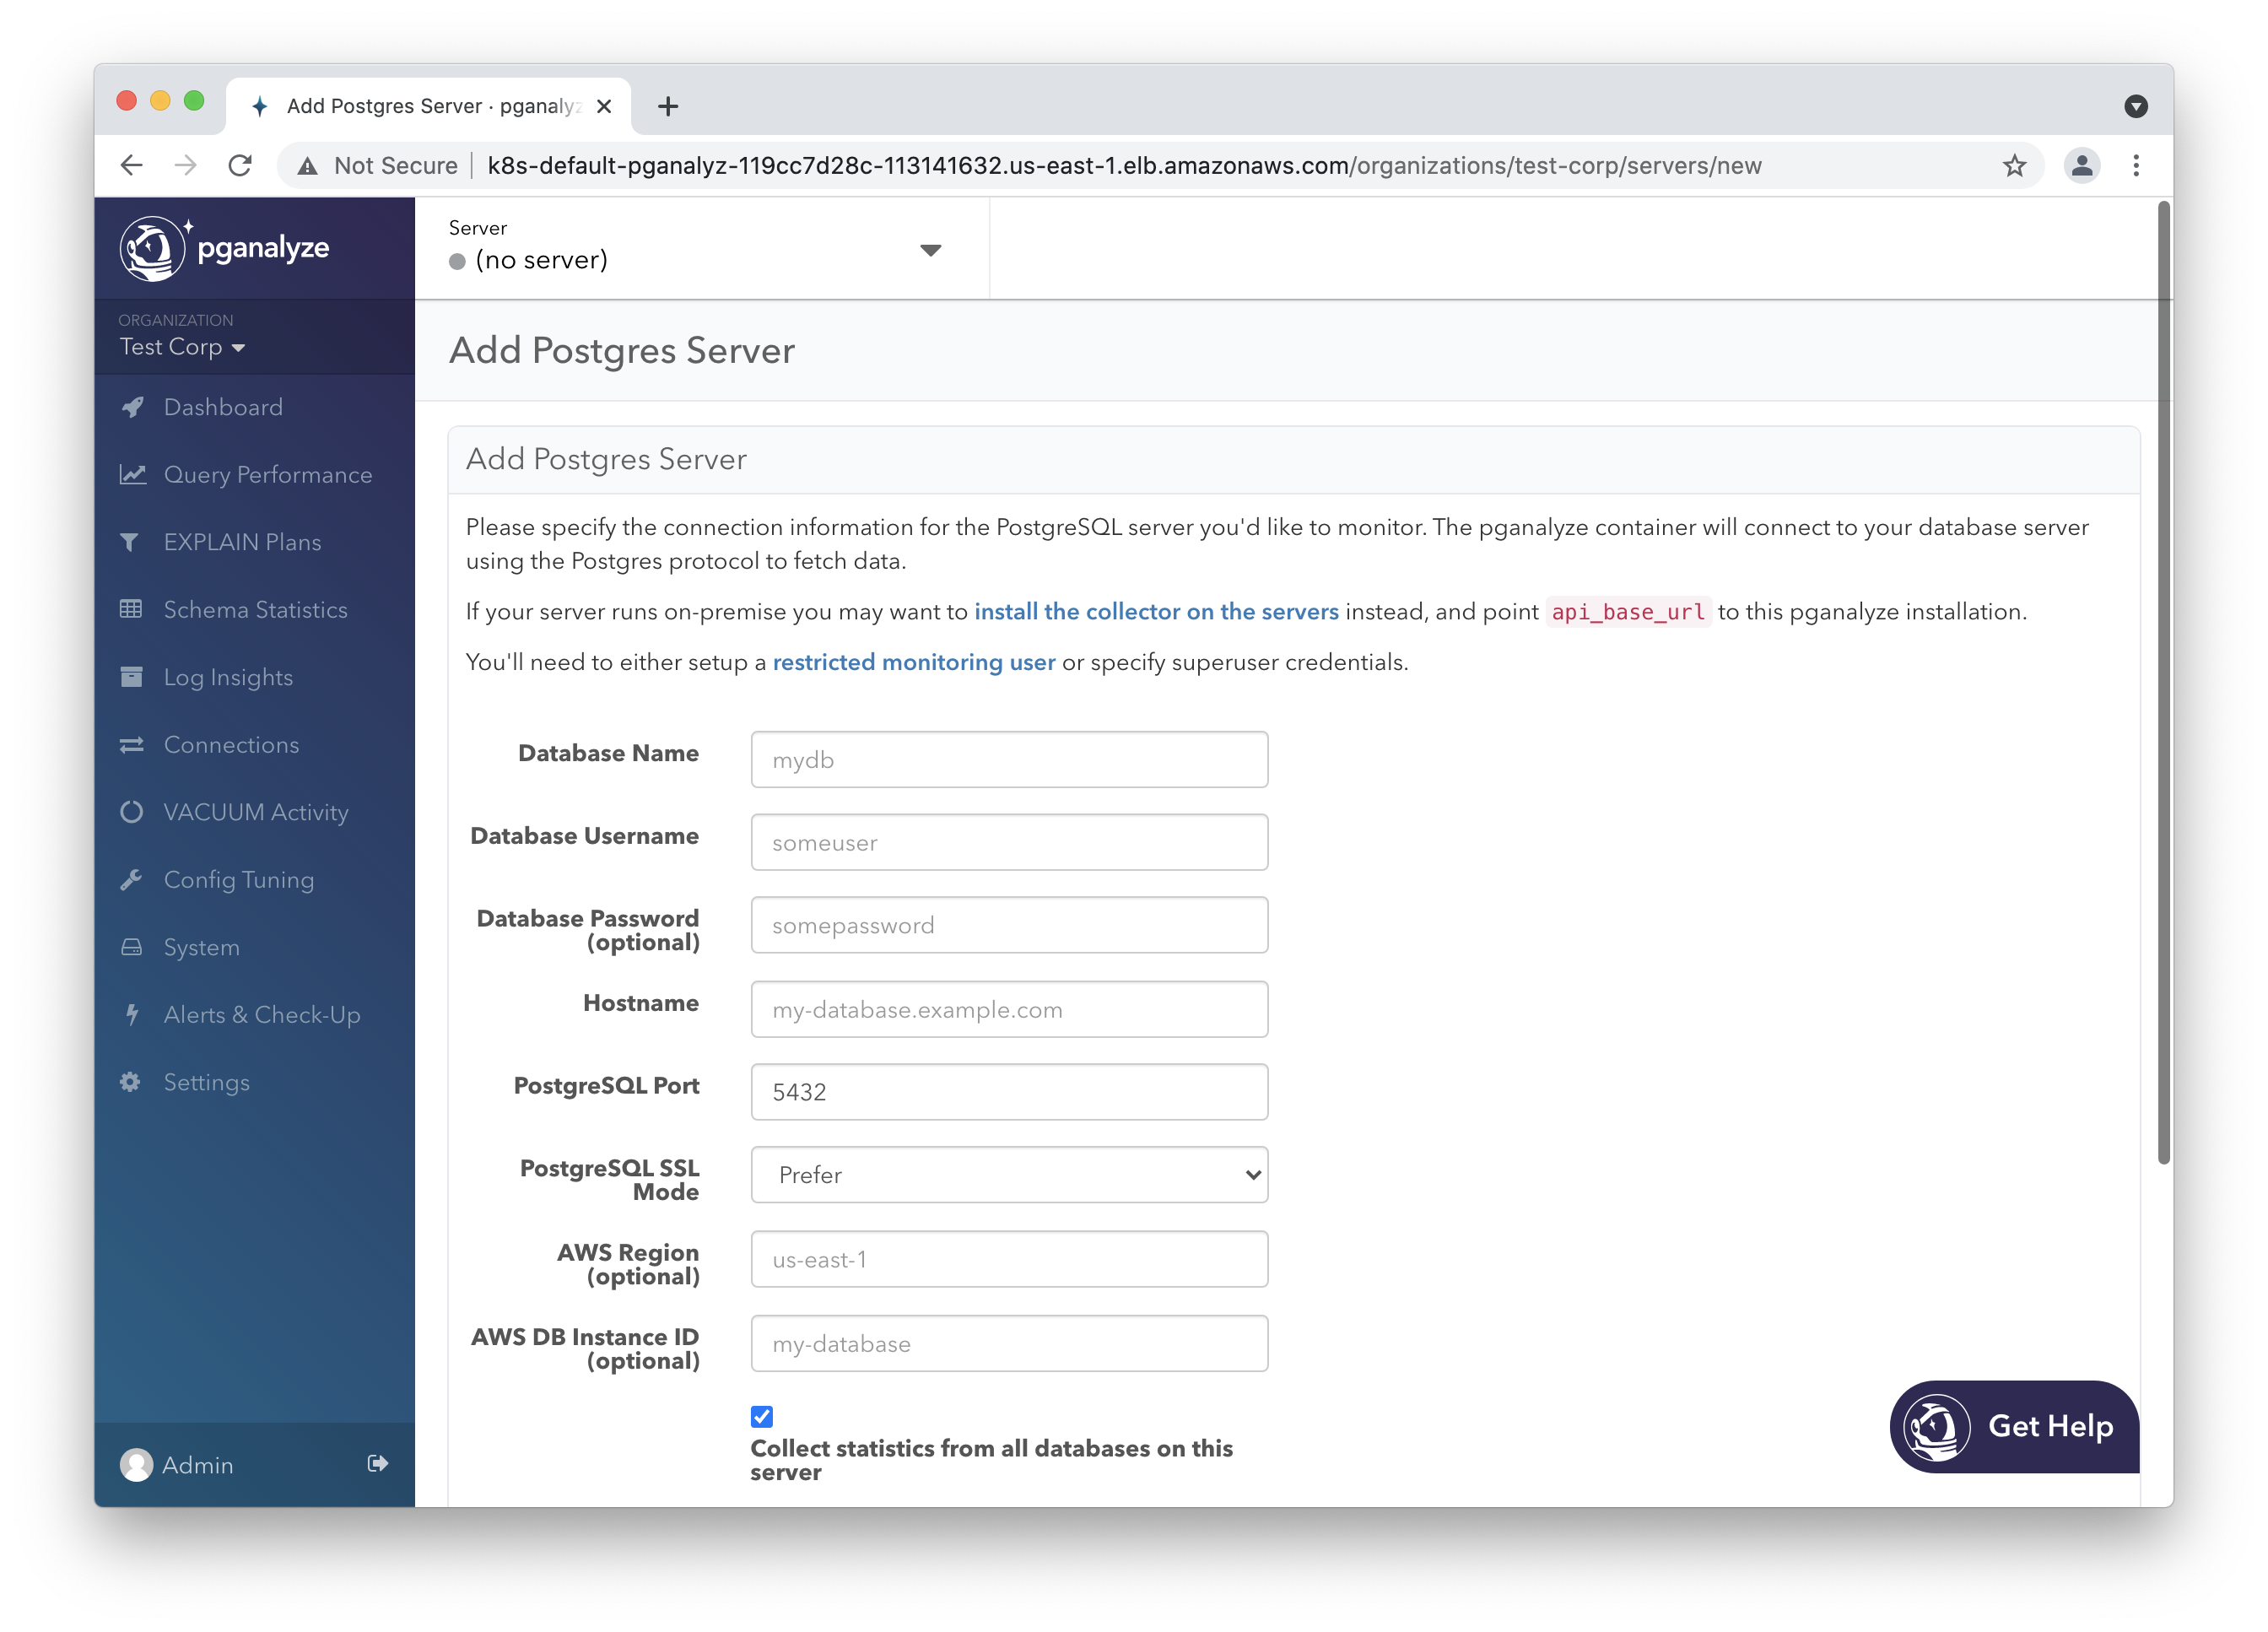
Step 9: Add your first database server to pganalyze
For a monitoring an Amazon RDS instance, or an Amazon Aurora cluster, you can use the bundled container with the pganalyze Enterprise Server container image.
To do so, fill out the “Add Postgres Server” form. When monitoring Amazon Aurora you can use the cluster endpoint as the hostname.
Once you click “Add Database” the collector running inside the container will update, and start collecting information within 10 minutes.
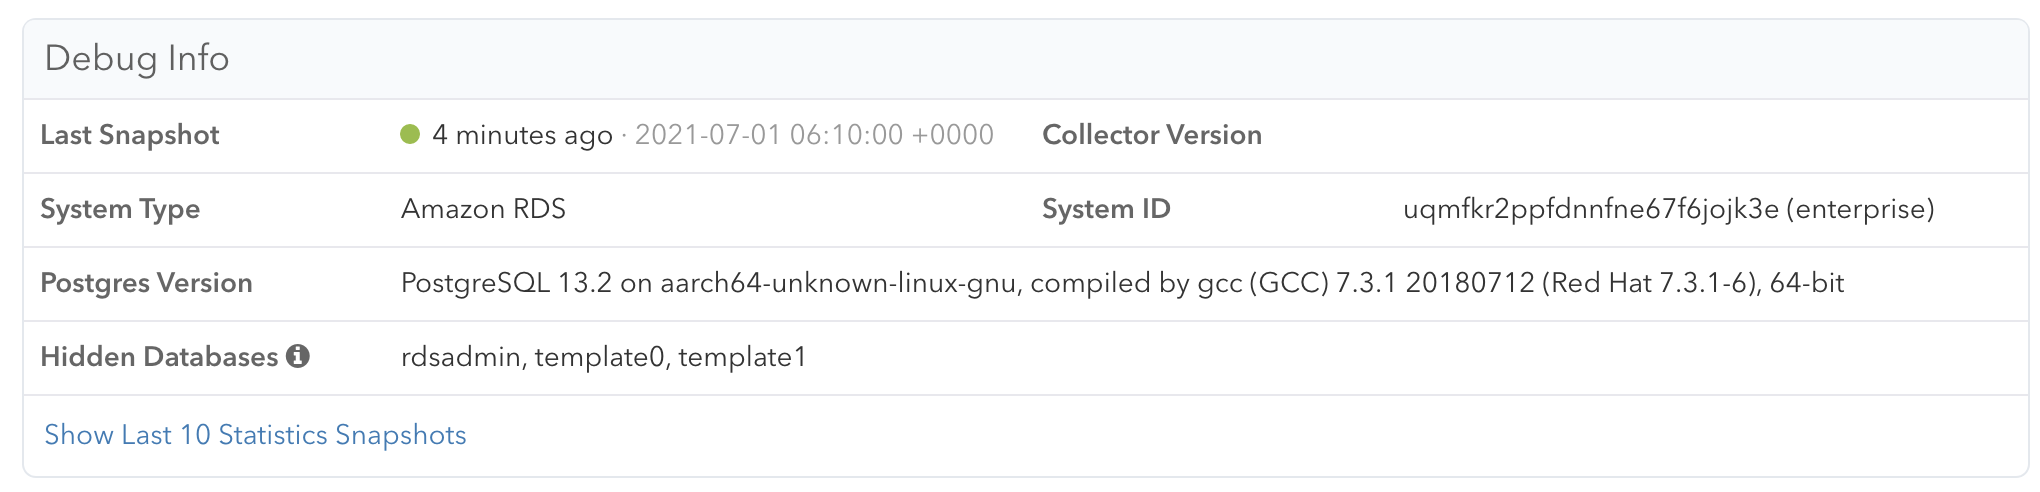
You can check whether any information has been received by clicking the “Server Settings” link in the left navigation, and scrolling down to the “Debug Info” section:
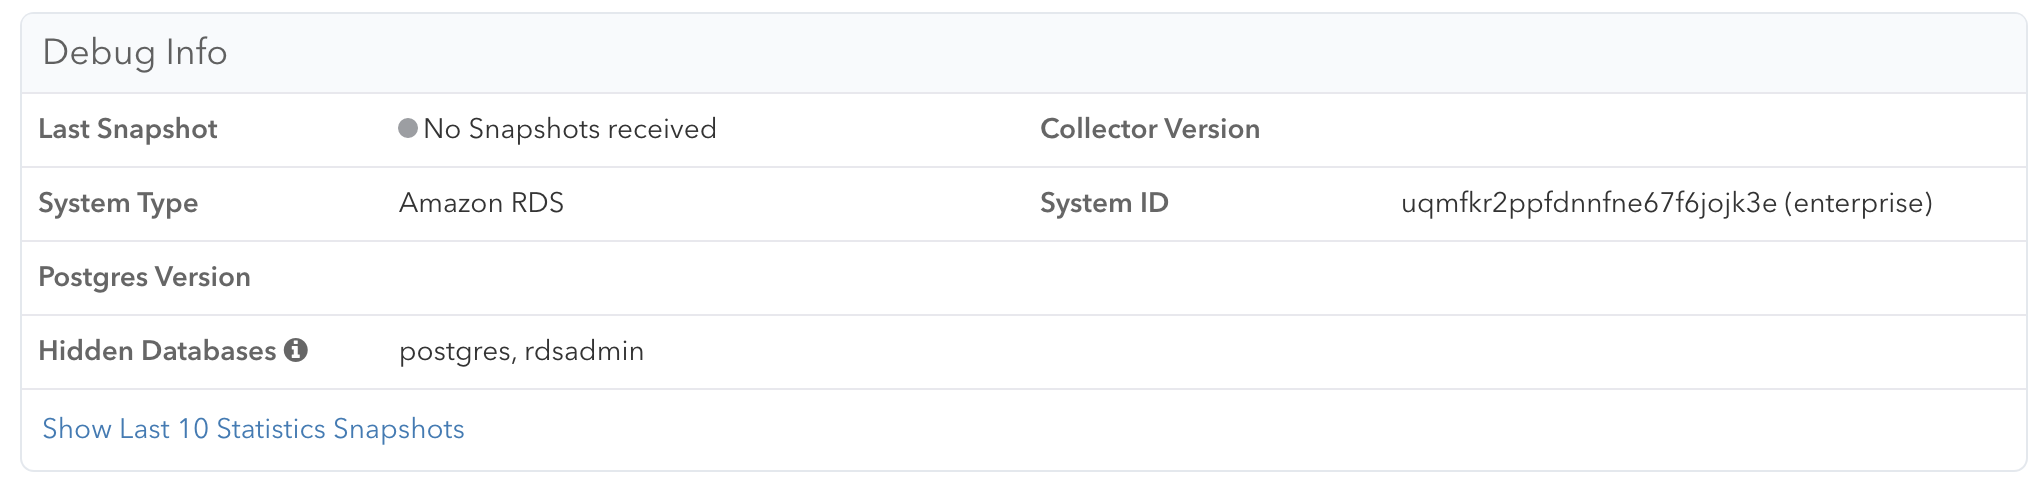
Once data is coming in successfully, the “Debug Info” looks like this:
Important: Be aware that some graphs need at least a few hours worth of data and might not work properly before.
Next steps
To learn more about adding additional team members, see Account Management.
We also recommend changing both the email and password of the admin user initially created (you can do so by clicking on “Admin” in the lower left of the screen).
Additionally, you can review all configuration settings for the Enterprise container.
Appendix: How to apply config changes
In case you want to make adjustments to the configuration, simply adjust the pganalyze-enterprise.yml file from earlier, and then apply with kubectl:
kubectl apply -f pganalyze-enterprise.ymlWhen changing the secrets information without changing the Kubernetes template, you can restart the deployment like this:
kubectl rollout restart deployment pganalyzeCouldn't find what you were looking for or want to talk about something specific?
Start a conversation with us →